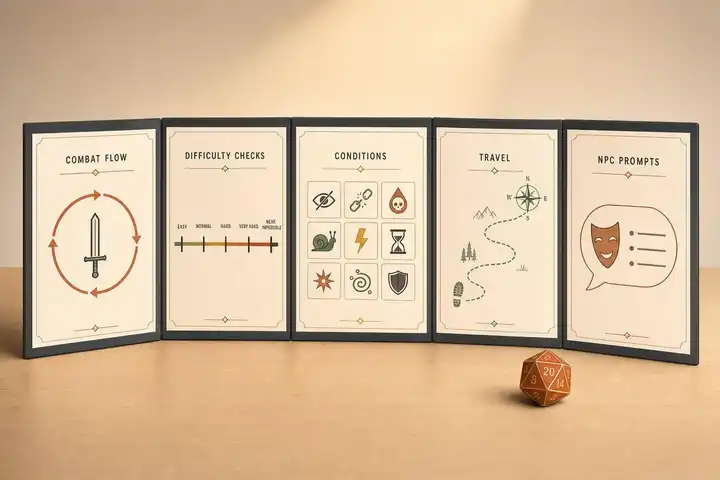
A useful GM screen does one job: cut table delays. If I check a rule more than once every session, it earns space. If I almost never need it, I leave it out.
Here’s the short version:
- I keep combat flow in front of me: turn order, actions, reactions, movement, and common conditions.
- I add fast ruling tools: DC benchmarks, passive Perception, cover, light, saves, and damage notes.
- I keep exploration and improv prompts nearby: travel pace, time tracking, weather, hazard notes, NPC names, and encounter prompts.
- I skip space-hogs: full spell text, full stat blocks, deep lore, player inventory, and rare subsystems.
That setup covers the parts of play that slow tables down most: combat, travel, and unplanned scenes. In many games, the same small set of rules comes up again and again, while a lot of the rulebook does not. So I want the high-use 20% on the screen, not the other 80%.
My rule is simple: if I can’t find it fast, I make a call and keep the game moving.
Quick comparison
| Keep on the screen | Leave in notes or books |
|---|---|
| Combat order, conditions, DCs, cover, passive scores | Full spell text, full monster stats, lore dumps |
| Travel pace, light, hazard reminders | Rare subsystems, crafting, downtime charts |
| NPC names, motives, rumor prompts | Long backstories, big recaps, player gear lists |
So the goal isn’t to fit more on the screen. It’s to fit the right things on it.

GM Screen Essentials: What to Keep vs. What to Cut
TOP 20 DM SCREEN Items | Dungeon Master Screen Tips for D&D 5e
What Belongs on a GM Screen
Put only the stuff you need during active play on your GM screen. Then use the rest of the space for the rules and tables you check again and again.
A simple way to sort it is into three buckets:
- Rules you pause for
- Tables you check often
- Prompts that help you improvise
That means the screen should help with fast rules lookups, repeat-use tables, and short prompts you can grab in the moment.
Keep it lean. Add only the tools that make play move faster, and cut everything else.
Leave off full spell text, deep lore, and rare subsystems. If you won’t reach for it while dice are rolling, it probably belongs in your books or prep notes instead.
| Worth Screen Space | Better in Prep Notes |
|---|---|
| Ability checks, saving throws, combat actions, DC benchmarks | Full spell text, deep lore, rare rulings |
| NPC names, traits, secrets | Extensive backstories, historical timelines |
| Initiative trackers, conditions, damage notes | Complex grappling or mounted combat subsystems |
| Travel pace, light/visibility, weather | Detailed economy or trade route tables |
Format matters too. Bold key numbers, keep each entry short, and use bullet points instead of long paragraphs. A GM screen should be easy to scan in a second or two.
Start with the system-specific references you use in almost every session. From there, sort those core items into the rules and tables that save the most time at the table.
1. TTRPG Games Directory for System-Specific GM Screen Ideas
Different systems need different screen references, so your inserts should match the rules you use most at the table. The goal stays the same: keep the rules you reach for all the time in plain sight so the game doesn't slow to a crawl.
System-specific inserts help your screen match the way you actually run the game. Put condensed references for combat order, conditions, DCs, and skill reminders on the screen, since those come up in pretty much every session. For improv, keep NPC names, voice notes, and random encounter prompts close by so you can react fast when players go off script.
Printed or digital, the best screen puts the answer right in front of you at a glance. In practice, that usually means a few core categories. Start with the rules you need every round.
2. Combat Round Sequence
Combat is where a GM reference sheet pays off. It keeps initiative, turn order, and status changes in plain sight, so you can run each round without flipping through the book.
Used Multiple Times Per Session
Keep the round sequence visible at all times: initiative, turn order, the active turn, reactions, and end-of-turn effects.
Prevents Book Lookups Mid-Scene
The parts people most often lose track of are surprise and end-of-turn effects, so add a one-line reminder for each. Surprised creatures can't move or act on their first turn and can't react until that turn ends.
That tiny prompt can save a stop-and-check in the middle of a fight.
Supports Fast Rulings or Improv
The sequence also gives you a clean place to slot improvised rulings. You can decide whether something happens before the turn, during the turn, in the reaction window, or at cleanup.
That makes fast calls much easier because you still know exactly where the fight stands.
Fits in One Compact Panel
Use this as the core combat panel:
| Combat Phase | What to Track |
|---|---|
| Initiative and Surprise | Turn order, surprised creature restrictions |
| Start of Turn | Ongoing damage, regeneration, concentration |
| Active Turn | Action, Bonus Action, Movement |
| Reactions | Opportunity attacks, readied actions |
| End of Turn | Saving throws vs. conditions, expiring effects |
| Next Round | Return to the top of the initiative order |
With the round order visible, the next big time-saver is the action economy each turn uses.
3. Action, Bonus Action, Reaction, and Movement Reference
Once turn order is clear, the next thing you want on screen is what a creature can actually do on its turn.
What to Track on a Turn
If you can't find the rule in 2 minutes, make a ruling and move on.
A clean four-row table gives you the full picture at a glance:
| Category | Key Examples | What It Solves |
|---|---|---|
| Actions | Attack, Dash, Disengage, Dodge, Help, Hide, Ready, Search, Use Object | Cuts down on mid-turn pauses when players ask, "What can I do?" |
| Bonus Actions | Two-weapon attack, bonus action spells, Cunning Action | Shows what can trigger them and what limits apply |
| Reactions | Opportunity Attack, Readied Action trigger | Handles out-of-turn play without slowing the round |
| Movement | Difficult Terrain, Standing Up, Climbing, Swimming, Crawling | Lets you rule on position and tactics right away |
When the action economy is in plain view, the next rule set worth keeping handy is conditions.
4. Conditions Summary
After action economy, conditions are the next combat reference that should stay in view. The goal is simple: show only the shortest effects that help at the table. Save the full wording for the rulebook.
A small conditions panel with one-line entries gives you the effect you need right away, instead of sending you digging through 300+ page core books:
| Condition | Core Effect |
|---|---|
| Blinded | Auto-fail sight checks; attacks against have advantage, attacks made have disadvantage |
| Charmed | Can't attack the charmer; charmer has advantage on social checks |
| Frightened | Disadvantage on checks/attacks while source is in sight; can't move closer |
| Grappled | Speed 0 |
| Incapacitated | No actions or reactions |
| Paralyzed | Incapacitated; auto-fail Str/Dex saves; attacks within 5 ft. are critical hits |
| Poisoned | Disadvantage on attack rolls and ability checks |
| Prone | Disadvantage on attacks; melee attacks against have advantage, ranged have disadvantage |
| Restrained | Speed 0; disadvantage on attacks; attacks against have advantage |
| Stunned | Incapacitated; auto-fail Str/Dex saves; attacks against have advantage |
| Unconscious | Paralyzed; drop held items; fall prone |
Prevents Book Lookups Mid-Scene
Visible condition notes cut down on mid-scene rule searches. That matters when combat is moving and no one wants to pause for a page flip.
Supports Fast Rulings or Improv
Use one-line effects, not full rules text. Grappled: speed 0 is exactly the kind of reminder that keeps play moving.
Fits in One Compact Panel
This only works if you edit hard. Keep the single effect you need at the table, and leave edge-case wording in the rulebook. That keeps the panel fast, clean, and easy to scan.
With conditions covered, the next useful panel is cover, visibility, and common combat modifiers.
5. Cover, Visibility, and Common Combat Modifiers
Cover and lighting come up in almost every fight. And when they do, they can slow the whole turn down if someone has to dig through the book. This panel gives you the combat modifiers people ask about most, so you can handle attack rolls and Perception checks on the spot.
| Situation | Effect |
|---|---|
| Half Cover | +2 to AC and Dex saves |
| Three-Quarters Cover | +5 to AC and Dex saves |
| Total Cover | Cannot be targeted directly |
| Dim Light (lightly obscured) | Disadvantage on Perception checks |
| Darkness (heavily obscured) | Use Blinded rules |
| Advantage | Roll 2d20, keep highest |
| Disadvantage | Roll 2d20, keep lowest |
Keep these rules in plain sight. That way, when someone asks, “Does this count as cover?” or “Can I even see them?” you can answer fast and keep combat moving.
With cover and visibility handled, the next fast lookup is DC benchmarks for common checks.
6. Difficulty Class Benchmarks
DC benchmarks deserve a spot on almost any GM screen because they let you turn improvised checks into instant rulings. When ability checks and off-the-cuff actions come up, having a number ready helps keep the table moving.
The standard DC scale fits neatly into one corner or panel:
| Task Difficulty | DC |
|---|---|
| Easy | 10 |
| Medium | 15 |
| Hard | 20 |
| Very Hard | 25 |
Medium (15) works for most routine tasks. Hard (20) is a good fit for meaningful challenges. These benchmarks are especially handy when players go off-script, since they give you a fast way to rule on unexpected actions, exploration challenges, and social checks without stalling the session.
Use this space for the core DC chart, not niche edge cases.
These benchmarks also pair well with passive Perception and other skill reminders.
7. Passive Perception and Skill Check Reminders
Used Multiple Times Per Session
Keep passive scores visible right next to your DCs. That way, when a check happens without a roll, you have the number in front of you. A small box for each player's passive Perception and passive Insight is usually enough.
The formula is simple: 10 + the usual modifiers.
Prevents Book Lookups Mid-Scene
Below those passive scores, add the skill and ability pairings you call for most. This saves you from flipping through rules in the middle of a scene.
A few that come up a lot:
- Grappling: Athletics vs. Athletics or Acrobatics
- Hiding: Stealth vs. passive Perception or active Perception
Supports Fast Rulings or Improv
When you need to make a call on the fly, use the same DC scale from the previous panel. The goal here is simple: keep the skill reminders that help with hidden information and contested checks, so play doesn't stall.
Keep It Compact
Don't turn this into a giant rules summary. Stick to the passive scores, numbers, and pairings you use most often.
8. Saving Throw and Damage Adjudication Notes
After conditions and combat modifiers, keep your save and damage notes close by for the stuff that drops HP the fastest.
Saving throws show up all the time, especially for concentration checks, death saves, spell effects, and hazards. You don't need to list every save. Just keep the ones you roll most often. Also flag any effect that deals half damage on a successful save. That's one of those small rules that can slip your mind right in the middle of combat.
Damage rulings can bog things down in a hurry. A short reference for resistance, vulnerability, immunity, falling damage, improvised damage, and common hazards helps you make the call and move on. These notes matter most the second an effect hits and you need the answer NOW.
Keep this panel lean:
- Common save types
- Half-damage-on-success reminders
- Short notes on common damage modifiers and hazards
That's all this section needs to do.
9. Travel Pace, Timekeeping, and Exploration Procedures
After combat, travel is often where a session starts to drag. It’s one of those parts of the game that sounds simple until the group changes pace, takes a detour, or asks, “How long will that take?” That’s why travel pace and exploration rules deserve a spot on your GM screen. When timing matters, having them in front of you helps the table keep moving.
Used Multiple Times Per Session
A short note on overland pace and timekeeping answers the travel questions that come up again and again before they slow the scene down. If the party speeds up, slows down, or takes the long way around, you can check one small reference and keep play going.
If your campaign tracks logistics, put food and water here too. It also helps to keep reminders for navigation, foraging, and random encounter checks close by.
Prevents Book Lookups Mid-Scene
If a travel rule takes more than 2 minutes to find, make the call and move on. That simple habit saves a lot of dead air.
It also helps to mark whether travel is just a quick transition or a journey you plan to track in detail. For longer trips, use a simple timeline by day or by watch. You don’t need anything fancy. A clean sequence is usually enough.
Supports Fast Rulings
Keep character-specific exceptions nearby, especially spells or abilities that skip food, water, exhaustion, or navigation checks. Those details change travel more often than people expect.
And when the party wanders off the path you planned - because of course they will - a few prepared encounter prompts make improvisation much easier. You can react in the moment without losing your sense of direction for the adventure.
Fits in One Compact Panel
Travel rules can still fit in one small panel if you keep them lean. Focus on pace, time, logistics, and the checks that come up most. Once that’s covered, the next thing worth placing nearby is weather, light, and terrain hazards.
10. Weather, Light, and Environmental Hazard Notes
Weather, light, and hazards call for fast rulings. If you have the rules you check most sitting right on your screen, you can keep the game moving instead of stopping to dig through a book. The easiest way to do that is with a small hazard table.
Prevents Book Lookups Mid-Scene
If a hazard ruling takes more than two minutes to find, make the call and move on.
A compact hazard table covers the calls that come up most often. That’s the whole job here: keep play moving with a quick, steady ruling.
| Hazard Type | What to Note | Why It Helps |
|---|---|---|
| Light/Visibility | Perception and attack modifiers | Fast combat adjudication |
| Movement | Difficult terrain and falling rules | Speeds up tactical play |
| Environment | Save type, damage, or ongoing effect | Quick adjudication of hazard outcomes |
| Survival | Con/Dex save reminders for heat, cold, or suffocation | Handles common hazard checks |
Supports Fast Rulings or Improv
When hazards shift the scene, a short note plus a DC benchmark is often all you need. That gives you enough to rule on the spot without turning the moment into a delay. Then stick with that same ruling for the rest of the session so the table has a steady frame of reference.
Fits in One Compact Panel
List only the key terms - Darkness, Suffocation, Difficult Terrain - and keep each one to a few bullet points. You only need the effect, save, or movement rule that comes up at the table. If your campaign is set in the desert, arctic, or somewhere else with its own problems, swap in notes that match that setting.
Keep these notes next to your NPC and encounter prompts so environmental trouble becomes a scene, not a pause. And if the action turns suddenly, having a short list of NPC names and encounter prompts nearby makes that pivot much easier.
11. NPC Names, Traits, and Motivations List
After combat and travel tools, NPC notes are one of the fastest ways to keep social scenes from stalling. When players start talking to someone you didn't plan for, a location-based name list keeps you from freezing up or reaching for a random name that doesn't fit.
The setup can stay simple. Keep a short list of names and quick NPC notes on hand so you can answer character questions right away. For each NPC, track five fields: name, role, motive, secret, and one memorable detail. You can also add a few traits, an ancestry or creature type note, and a voice note. That gives you a plug-and-play character you can drop into the scene in seconds. For NPCs the party already knows, one line per entry is enough.
A quick reaction tag helps too. Mark each NPC as friendly, guarded, suspicious, or hostile, then note how that changes if the party helps or threatens them. If the party helps, the NPC might offer discounts or share extra information. If threatened, they may turn guarded and start spreading negative rumors.
To keep the list easy to use, sort names by current location and keep a separate Past NPCs list. Limit each entry to one or two details that players will remember. Then, when an unexpected conversation turns into a whole scene, you can pull from this list and pair it with random encounter prompts to keep things moving.
12. Random Encounter and Improvisation Prompts
Use this panel for the fast prompts that patch gaps after your NPC list: names, rumors, encounters, and scene flavor. It keeps the session moving when the party veers off-script. The moment players start talking to someone you didn't plan for, this panel gives you the next detail on the spot.
Used Multiple Times Per Session
Keep a small set of encounter prompts, local names, rumors, and loot ideas ready for off-script scenes. That way, the game doesn't stall when players wander into ground you didn't prep.
Prevents Book Lookups Mid-Scene
A compact panel with tavern details, rumors, and loot gives you instant flavor without stopping to flip through a book. If you want more variety, add d100 prompts like villain traits, magical fountain effects, and random book titles.
Supports Fast Rulings or Improv
For improvised NPCs, use a three-part formula: motive, secret, and one standout detail. Voice notes on tone, pace, and quirks can make those NPCs feel different right away. A short "scene beats" area using Situation → Action → Consequence can also help you guide the scene back toward the main plot when needed.
Fits in One Compact Panel
This reference works best in a landscape-oriented panel with bold labels and bullet points instead of thick paragraphs. Include a few premade name lists, blank setting-specific slots, and a small tracker for names and loot you've already used. Keep the layout simple so each prompt works at a glance.
How to Arrange Your Screen for Faster Play
Once you’ve got the right references, the next step is placement. Put the things you reach for all the time where your eyes land first. Then push slower, less-used material to the sides. In most games, combat sequence, conditions, and DC benchmarks should sit front and center.
| Screen Position | Best Content | Examples |
|---|---|---|
| Center Panel | High-frequency combat rules | Combat sequence, conditions, DCs, cover |
| Left Panel | Social and improv tools | NPC names, vocal quirks, tavern names, random traits |
| Right Panel | Exploration and world rules | Travel pace, weather, random encounters, village amenities |
| Swap-in Inserts | Session-specific notes | Session notes, plot beats, loot, NPC secrets |
Think of it like setting up a desk. The stuff you use every few minutes stays within easy reach. The rest can sit off to the side until you need it.
Letter-size PDF inserts fit most screen sleeves and make swapping pages easy. That makes them a good fit for session notes, current plot beats, and NPC secrets.
A few small formatting choices help more than people expect:
- Bold DCs, names, and key numbers
- Use short bullets
- Put the most important information first
That same layout also makes another point clear: if something doesn’t help you run the game in the moment, it probably doesn’t deserve screen space.
What to Leave Off Your GM Reference Sheet
Once your screen starts feeling crowded, trim anything that doesn't save time at the table. The goal is simple: keep the stuff that helps you make calls fast or improvise on the fly, and cut the rest.
Full monster stat blocks are a common thing to remove first. They're tied to specific encounters, and they eat up too much room. Keep those in your Monster Manual, on index cards, or in a digital tracker instead.
Player gear tracking should stay with the players. You don't need your screen clogged with who has rope, torches, or three extra daggers.
For the same reason, skip full adventure summaries. You usually only need the beats that help you run this session. A one-page session beat sheet works better than a long recap.
Rare subsystems like ship-to-ship combat, crafting tables, and downtime charts don't need a permanent spot either. When they come up, pull them from the rulebook.
As Mike Shea, author of Return of the Lazy Dungeon Master, puts it: use what works, omit the rest. If it doesn't speed play, leave it off the screen. That sets up a clean shortlist for the quick comparison ahead.
Must-Have, Nice-to-Have, and Campaign-Specific Inserts: A Quick Comparison
After you trim the screen, sort what’s left by how often you reach for it.
That simple filter makes the next call much easier: what stays up every session, what’s nice to keep around, and what should rotate in and out based on the current arc.
| Category | Content Examples | Why It Belongs |
|---|---|---|
| Core Must-Haves | Combat sequence, action economy, conditions, DC benchmarks, NPC names | Used every session; prevents rule searches. |
| Optional | Random encounter tables, NPC trait prompts, general loot lists | Adds improvisation support, but the session can still run smoothly without it |
| Campaign Inserts | Current plot points, local maps, tavern or shop details, wilderness travel rules, faction lists, arc-specific hazards | Relevant to the current location or arc, then easy to swap out when the party moves on |
A good rule of thumb: if you check it in almost every game, it belongs in Core Must-Haves. If it helps when things go off-script, but you can run just fine without it, put it in Optional. And if it only matters in the current town, dungeon, or story beat, it’s a Campaign Insert.
Use this split to decide what stays on the screen every session and what rotates with the current arc.
Next, place the must-haves where you can see them first.
Conclusion
A good GM screen isn't about cramming in every rule you know. It's about keeping the ones you use most close at hand, then shaping the rest around how your table actually plays.
Build your screen for the kind of game you run most often, whether that's combat, exploration, social scenes, or encounters. Think of it as a living reference: keep what helps the game move, and remove what doesn't.
FAQs
How do I know if a rule belongs on my GM screen?
Put it on your reference sheet if it helps the game move cleanly, cuts down on page-flipping, or makes it easier to improvise on the fly.
Focus on the rules you look up a lot, like common difficulty thresholds, basic combat actions, and saving throws. It also helps to add ready-to-use tools, such as NPC name lists, loot ideas, random encounter prompts, and short condition summaries.
If a rule is complicated or only comes up once in a while, skip it.
What should a beginner put on a GM screen first?
Start with the rules you use most so you spend less time flipping through pages:
- common difficulty thresholds
- saving throws that come up a lot
- basic combat actions
- random NPC names
- player stats like Armor Class and Passive Perception
Keep it simple at first. Add more as your game starts to show you what you need.
Should I use a fixed GM screen or swap inserts by session?
Yes. A fixed core rules screen works well. Then you can swap in session-specific inserts to keep your references relevant and organized.
Use inserts for current plot beats, active NPCs, and likely encounters. Templates make prep faster, cut down on page-flipping, and help you balance a stable rules base with your campaign’s changing needs.


