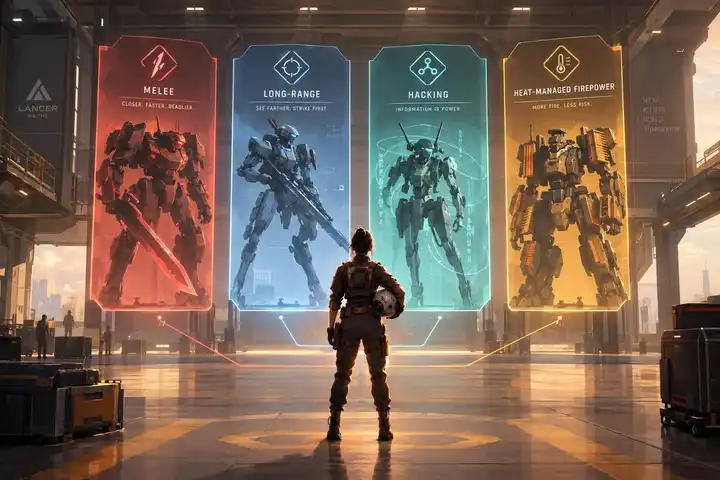
Choose your first Lancer license for its Rank I gear - not just its frame. At LL1, that gear can shape how your Everest plays. The four featured frames arrive at Rank II, and none requires sticking with one manufacturer afterward.
The best starting path depends on the decisions you enjoy: closing into melee, lining up shots, helping allies through hacking, or balancing firepower against heat.
Quick Comparison
| License path | Main focus | Rules burden | Main risk |
|---|---|---|---|
| IPS-N Blackbeard | Melee, grappling, and close-range control | Moderate | Taking too much fire while closing the gap |
| SSC Death’s Head | Precise, long-range shooting | Moderate | Blocked sightlines and enemies getting close |
| HORUS Goblin | Hacking, disruption, and team support | High | Low durability and effects that need allied follow-up |
| Harrison Armory Sherman | Ranged damage and heat management | Moderate to high | Building heat faster than it can be cleared |
There’s no need to rush out of the Everest. Start with the tools that fit the role, learn their action costs and limits, then decide whether the matching frame is the right next step.

Lancer First License Guide: Four Paths for New Pilots
1. IPS-N - Blackbeard
Combat Role
Blackbeard pairs IPS-N durability with an aggressive melee Striker role and strong grappling tools. Its Grapple Cable reaches Range 5. On a successful grapple, it pulls Blackbeard adjacent to the target along the most direct available path. Use it to pin targets and create openings. For new pilots, Blackbeard is a hands-on lesson in melee fundamentals.
Survivability and Positioning
With 12 HP, 1 Armor, and Speed 5, Blackbeard can reach the front and take some punishment. Still, approach through cover rather than charging across open ground without support. Before grappling, check cover, terrain, elevation, and occupied spaces. If there's no adjacent space available, the pull fails. Favor controlled angles over reckless charges.
Heat and System Management
Heat Cap 4 and E-Defense 6 leave Blackbeard at risk from heat and tech attacks, so leave room to absorb heat. Its 5 system points also favor a focused loadout.
Rules Complexity
Blackbeard is moderately complex, not mechanically simple. Getting into melee is straightforward; playing it well means learning grapple timing, movement restrictions, adjacent-space checks, reactions, and cover. Blackbeard can still Boost and take reactions while grappling, letting it maintain pressure rather than go passive.
For an Everest pilot, Rank I supplies immediate melee tools. The Chain Axe provides Reliable 2, while Synthetic Muscle Netting supports grappling and close-control tactics. These tools make Blackbeard a strong first license for learning close-range control on an Everest.
2. Smith-Shimano Corpro (SSC) - Death’s Head
Combat Role
Blackbeard closes the gap. Death’s Head keeps its distance. SSC favors precision and mobility, but Death’s Head is a long-range artillery frame, not a mobile skirmisher. Pick off exposed supports, controllers, or wounded enemies rather than firing at whoever’s closest.
Perfected Targeting adds +1 to ranged attack rolls and lets you reroll your first ranged attack each round - but you must keep the second result.
Survivability and Positioning
With 8 HP and 0 Armor, Death’s Head needs cover, allies to screen it, and a way out. Don’t hold your position for a stationary bonus if it leaves you exposed. Staying alive means another chance to fire. Speed 5 helps you find better angles, not trade blows up close.
Heat and System Management
A Heat Cap of 6 leaves some breathing room, but careless overcharging can still cause trouble. At Death’s Head License Rank I, an Everest can take High-Stress Mag Clamps or Tracking Drone.
Mag Clamps cost 1 SP and let you treat solid surfaces as flat ground, so you can move normally across walls and other surfaces. There’s a catch: if you’re knocked prone, you start falling.
Rules Complexity
Death’s Head is moderately complex. Its basic plan is simple, but playing it well means watching sightlines, choosing targets, and knowing when to retreat. Choose SSC first if patient precision fire and careful positioning sound like your style.
For a more disruptive back-line approach, the next license trades precision fire for hacking.
3. HORUS - Goblin
Combat Role
Goblin is a support-controller. With Sensors 20, +2 Tech Attack, and +1 Accuracy on tech attacks, it can disrupt enemies from range. Tech attacks target E-Defense, not Evasion. Use them to apply conditions, interfere with enemy actions, and point allies toward targets they can exploit.
Survivability and Positioning
6 HP and Repair Cap 2 leave little room for mistakes. Stay behind tougher allies and use cover, but keep enemies within sensor range. E-Defense 12 only helps against tech attacks.
Rank I Equipment and Unlock Path
HORUS License I lets an Everest equip Goblin systems, including H0R_OS System Upgrade I and Autopod. Autopod grants a reaction attack when an ally within Range 15 consumes Lock On.
Rules Complexity
Goblin has the highest initial rules burden of these four choices. You'll need to track Sensors, E-Defense, conditions, forced movement, reactions, and allied timing.
Choose Goblin first if you want to help allies make their moves count; choose Harrison Armory next if you want heat-powered damage.
4. Harrison Armory - Sherman
Combat Role
Sherman is Harrison Armory’s most straightforward starting point for new pilots who want sustained ranged damage. It rewards a cycle of firing, repositioning, and cooling rather than pushing for maximum output every turn. The tradeoff? You need to manage heat.
Survivability and Positioning
Sherman’s 10 HP and Heat Cap 8 give it solid staying power, but you still need to track every self-heating weapon and system. Overheating can cause Stress and, eventually, reactor meltdown.
Rank I Equipment and Unlock Path
Rank I grants the SOL-Pattern Laser Rifle and Reactor Stabilizer. Both fit on an Everest, so you can try them before the Sherman frame unlocks at rank II. The SOL-Pattern Laser Rifle has Range 8, generates 1 heat, and deals 1d6 energy damage plus 1 burn. Rank II adds the Sherman frame, ANDROMEDA-Pattern Heavy Laser Rifle, and Redundant Systems Upgrade.
Redundant Systems Upgrade costs 3 SP and has Limited 1. Spending its charge lets you Stabilize as a quick action. That makes the rank-II package a better fit for pilots who already enjoy managing heat and want more durability, while offering a straightforward entry into Harrison Armory’s heat-based playstyle.
Rules Complexity
Sherman requires moderate heat tracking, with more focus on reactor management than Death’s Head. Check your heat before Overcharge or any self-heating action, and plan a Stabilize turn before you run out of room. If the fire, cool, and reposition rhythm appeals to you, try Sherman’s rank-I equipment on Everest before committing to the frame. Sherman hits hard, but careless heat use can punish you fast.
Lancer RPG Basic Mechanics Tutorial: Role Tags, Licensing & Systems | Shieldbreaker's Guide
Pros, Cons, and Beginner Pitfalls
If one of the four playstyles feels right, use this table to check what you gain - and what you give up. These tradeoffs apply to the four featured frames, not their manufacturers as a whole.
| License path | Main advantages | Main drawbacks | Beginner watch-out |
|---|---|---|---|
| IPS-N Blackbeard | Strong melee pressure and grappling. Suits aggressive pilots who like close-range decisions. | Needs to reach priority targets. Difficult terrain, cover, and enemy movement can stall your approach. | Don’t attack an enemy just because you can reach it. Check allied support and plan your next move before committing. |
| SSC Death’s Head | Precise shots at range against priority targets. Suits patient pilots who enjoy positioning. | Relies on clear sightlines. Moving objectives and blocked terrain can disrupt your setup. | Watch for fast melee attackers. Choose a fallback position before settling into a firing lane. |
| HORUS Goblin | Hacking and control that open opportunities for teammates. Suits players who enjoy support and rules interactions. | Fragile under direct fire. Needs allies who can take advantage of its effects. | Check each tech option’s action cost, range, line-of-sight requirements, and resolution. Hacking effects don’t all work the same way. |
| Harrison Armory Sherman | Sustained ranged firepower. Suits pilots who enjoy managing resources. | Heat limits your attacks, and cooling uses actions you could spend attacking. | Plan actions for cooling. A turn without an attack isn’t automatically a wasted turn. |
Focus on the decisions you want to make turn after turn.
Next, compare the Rank 1 gear each path gives an Everest.
Choose Your First License by Its Rank-1 Equipment
At LL1, choose a Rank I license for the tools you can use right away. Its associated frame arrives at Rank II. Use the comparison above to find the Rank I package that fits how you want to play.
| Option | Preferred role | Complexity | Key risk | Recommended player profile |
|---|---|---|---|---|
| IPS-N Blackbeard I | Melee and grappling | Moderate | Closing the distance can expose the pilot to concentrated enemy attacks | Players who want decisive turns, physical control, and close-range action |
| SSC Death’s Head I | Precision shooting | Moderate | Poor sight lines, cover, or enemy pressure can limit effectiveness | Patient players who like planning positions and waiting for high-value shots |
| HORUS Goblin I | Hacking and support | High | Extra rules to track and weak team follow-up can make support feel ineffective | Players who enjoy complex interactions, debuffs, and helping allies act |
| Harrison Armory Sherman I | Energy firepower and heat management | Moderate to high | Excess heat can force shutdowns or limit future actions | Players who enjoy burst damage, resource management, and calculated risk |
Complexity is guidance for play, not a formal game rating.
Your license choice doesn’t replace your starter frame. It gives you your first specialized toolset. GMS gear and the GMS-SP1 Everest are available at LL0, and the Everest can mount licensed gear when requirements allow.
If you’re undecided, stay in the Everest and choose the Rank I package that suits your preferred role. Treat Rank II as your next step - not a reason to leave the frame behind.
FAQs
Which first license best complements my team?
Choose your first license to fill a gap in your team: IPS-N Blackbeard for close-range grappling, SSC Death’s Head for precision shooting, HORUS Goblin for hacking and battlefield manipulation, or Harrison Armory Sherman for high-output, heat-based firepower.
Each license’s frame unlocks at license rank II. GMS equipment and the Everest don’t require a manufacturer license, so put your first investment toward a role your team needs help covering.
Can I combine gear from different licenses?
Yes. You can mix weapons, systems, and components from any licenses you’ve unlocked, regardless of manufacturer. Standard GMS equipment is also available and requires no license.
That means you can build your mech around your pilot’s needs and tactical preferences, choosing its combat capabilities, complexity, and playstyle.
Can I change my license if I dislike its playstyle?
Yes. In Lancer, you’re not locked into one manufacturer or frame. As you gain pilot levels, you can invest in different license ranks to gain access to frames, weapons, and systems that fit your preferred combat role and comfort with the mechanics. You can try different playstyles as you learn the game.


