Balancing homebrew items for your tabletop RPG can be tricky. Overpowered items can ruin challenges, while weak ones get ignored. Here's how to create balanced, fun items:
- Compare to Official Items: Use two similar official items as benchmarks.
- Limit Power: Avoid early access to strong abilities; follow level-based item progression.
- Add Constraints: Use attunement, charges, or resource costs to prevent abuse.
- Playtest: Test items in combat and utility scenarios to find imbalances.
- Gather Feedback: Regularly check with players and tweak items as needed.
- Avoid Overshadowing: Ensure items don’t outshine class features or other players.
- Introduce Trade-Offs: Add risks like curses, alignment shifts, or limited uses.
Balancing isn’t a one-time task. Be transparent with players about adjustments, and focus on keeping the game fair and engaging for everyone.

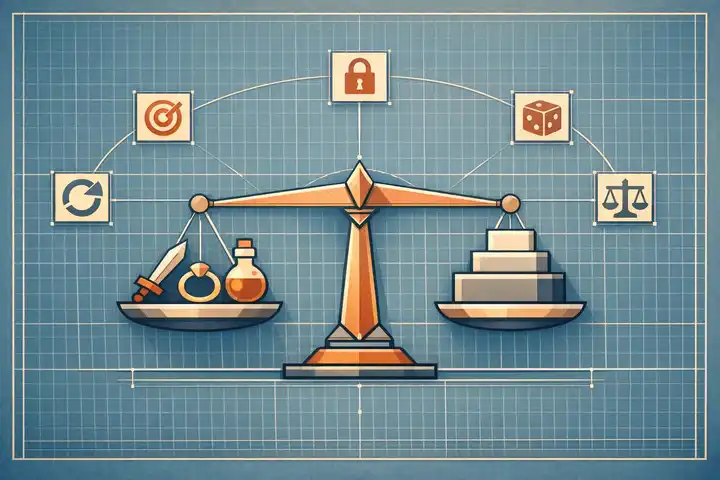
7-Step Checklist for Balancing Homebrew RPG Items
The SECRET to MASTERING Homebrew MAGIC ITEMS #4k
Assessing Power Levels
Balancing your homebrew item with the rest of the game requires careful evaluation of its strength compared to existing items. A good starting point is to compare your creation to two official items that serve a similar purpose. This helps ensure your item doesn’t turn into an overpowered alternative to established options.
Tyler "RPGBOT" Kamstra provides a helpful perspective on maintaining balance:
"Try to say 'Yes, but'. While 'Yes, and' is a common mantra in improvisational acting... character options are mechanics, not play-acting".
Encourage creativity, but introduce constraints to preserve the game’s equilibrium.
Comparing Against Official Items
Spotting imbalances early is key to maintaining a fair game. Use the Sniff Test to flag items that provide significantly higher damage or utility than official counterparts without any drawbacks. Tools like "Detect Balance" can help assign numerical values to your item. For example, most weapons in the Player’s Handbook score an 8 on this scale. Aim for a similar score to keep your homebrew item in line with existing choices.
Richard Bailey offers a broader perspective on balance:
"Balance doesn't mean every item is equal in strength. It means each item provides meaningful value without overshadowing core mechanics".
Once you've measured its general strength, evaluate how the item impacts both combat and utility.
Evaluating Combat and Utility Impact
To maintain balance, examine how your item performs in combat and its overall utility. Compare its damage per round to official items of the same tier. If your item offers consistent bonuses without any resource cost, you may need to tone it down. For defensive gear, consider how much protection it provides, such as increases to AC, resistance, or temporary hit points, and ensure these benefits align with similar official items.
Also, be cautious about creating items that overshadow class features, as this can disrupt the game’s design. Common and Uncommon items should focus on situational benefits or minor thematic enhancements rather than major combat boosts.
Balancing power isn’t just about mechanics - it’s also about timing.
Avoiding Early Access to Powerful Abilities
When abilities become available is just as important as their strength. Players generally receive their first permanent Uncommon item around level 4, their first Rare item at level 10, their first Very Rare item at level 16, and their first Legendary item at level 19. Introducing powerful abilities too early can upset the game’s progression and make encounters feel trivial.
To maintain balance, ensure that abilities like Extra Attack or spell-like effects are introduced gradually. Consider designing items with latent abilities that unlock through crafting tasks or story milestones. This keeps players engaged and excited while preserving the structure of your campaign.
Ensuring Mechanical Balance
When creating a homebrew item, it’s essential to stick to the design principles of the game. Deviating from these conventions can throw off gameplay and lead to unintended consequences. Start by examining how your item handles ability scores, passive features, and resource costs. Then, make sure its mechanics align with official game design.
Ability Score Bonuses and Passive Features
The official rules rarely allow more than a +2 bonus to a single ability score from one source. Anything beyond that, like a +3 bonus, is considered outside the norm and should generally be avoided. For reference, systems like "Detect Balance" assign a point value to these bonuses: a +1 increase is worth 4 points, while a +2 increase is valued at 8 points.
When it comes to static bonuses to Armor Class (AC), caution is key. A flat +1 bonus to AC (valued at 8 points) can disrupt the game’s bounded accuracy system. Combining multiple passive bonuses - like a +3 to AC and a +2 to saving throws - on a single item can lead to stacking issues, creating balance problems.
T.E. "RPGBOT" Kamstra offers a helpful reminder about overpowered items:
"If your player says 'It's X but better', give them a squinty, suspicious look and ask 'Better how?'... if they say something like 'more damage', it's probably garbage."
Attunement and Resource Costs
Attunement plays a critical role in maintaining balance. It prevents players from stacking too many permanent passive buffs and creates a direct connection between the character and the item. While Common and Uncommon items with situational effects might not need attunement, Rare, Very Rare, and Legendary items usually require it to manage their powerful effects. Items that could be passed around the party should also require attunement to maintain character identity and avoid abuse.
As EN World contributor abirdcall points out:
"The passing around is a big one to avoid. It is also good to have special items be connected to a single character. It becomes a part of their identity."
For particularly powerful effects, consider adding resource costs like spell slots, hit dice, or charges (e.g., 1d4+1 charges regained at dawn) to activate the abilities. This keeps the item’s strength in check while still allowing it to shine. Be sure to review the language and traits of your item to ensure they align with official examples.
Consistency with Official Mechanics
To keep your item balanced, its wording should match the phrasing used in official materials. Even small changes in wording can lead to mechanical loopholes or unintended exploits. Look at two or more official items that serve a similar purpose or power level to use as benchmarks for your design.
Limit your item to one to three defining traits to ensure it doesn’t bog down gameplay. If a player unfamiliar with the item can’t summarize its effects after reading, the design likely needs simplification. Additionally, restrict your homebrew item from multiclass builds initially, as these tend to create the most opportunities for unintended interactions. By aligning your item with these guidelines, you can maintain balance and keep your campaign running smoothly.
Incorporating Trade-Offs and Risks
When designing homebrew items, adding trade-offs is key to keeping gameplay balanced and engaging. By introducing limitations, risks, or conditions, you can ensure that powerful items don’t disrupt the game and still offer tactical depth. Let’s explore how to weave curses, usage restrictions, and behavioral consequences into your creations.
Adding Curses or Alignment Restrictions
A well-designed cursed item should tempt players enough to make them think twice before discarding it. As Richard Bailey, Creator, puts it:
"The curse should not simply punish the player but offer enough benefit to make them hesitate before abandoning it."
For instance, imagine a weapon that grants a +2 bonus to attack and damage rolls but gradually shifts the wielder's alignment toward evil. The downside unfolds over time, keeping players invested in the item’s story. To keep things fair, include a way to lift the curse - whether through a quest, rare magic, or divine intervention. This ensures players don’t feel unfairly trapped by an item they didn’t fully understand when they first attuned to it. Once curses are in place, usage limits can further balance the scales.
Managing Limited Uses and Charges
Setting limits on how often an item’s abilities can be used is a practical way to control its impact. For example, you might allow an item to regain 1d4+1 charges at dawn or restrict its most powerful abilities to once per long rest. Tactical buffs could recharge on a short rest, while minor features remain available at will. Starting with conservative limits gives you room to adjust the item's power as the campaign progresses. Reserve the most potent effects for limited use and let smaller abilities shine without restriction. This naturally leads to the next layer of complexity: behavioral consequences.
Behavioral and Gameplay Consequences
Risk-versus-reward mechanics add depth to gameplay. Picture a weapon that deals devastating damage but risks harming the wielder on a critical failure. This forces players to weigh their options carefully during combat. You can also introduce elements like Wisdom saving throws to resist compulsions or effects that make enemies target the wielder more frequently. Requiring resources - such as hit dice, hit points, or spell slots - to activate powerful features ensures these items don’t overshadow the character’s core abilities. These mechanics keep the game dynamic and encourage strategic thinking.
Playtesting and Refining Homebrew Items
Playtesting is where theory meets reality. It’s the process that uncovers issues you might never spot on paper. The goal isn’t to create flawless mechanics - it’s about ensuring every player gets their moment to shine and that choices feel impactful. A structured playtest can catch imbalances before they disrupt your campaign.
One-Shot Playtesting
Short, focused sessions are ideal for testing homebrew items under pressure. Run 2–4 rounds across three different scenarios: a low-stakes flavor encounter, a mid-level combat that stresses action economy or resource management, and an extreme edge case that pushes the item’s effects to the limit (like pairing it with invisibility or flight). Before diving in, try the "no instructions" method. As T.E. "RPGBOT" Kamstra puts it:
"If they can't figure it out on their own, that may be an indicator of a problem. If they figure it out from the text you gave them, great. If they immediately find an abuse case, that's a great piece of feedback".
Testing with someone who enjoys optimizing characters can quickly expose potential exploits, as they’re more likely to uncover edge cases.
While running the session, focus on key metrics: spotlight time (is one player dominating?), action economy stress (how often does the item grant extra actions?), and defensive effectiveness (is it boosting AC or resistances too much?). Afterward, use the Four F’s framework - Facts, Feelings, Findings, and Future - to separate raw data from the overall vibe of the session. These insights help you pinpoint what works and what needs a second look.
Gathering Player Feedback
Once you’ve gathered playtest data, it’s time to hear directly from your players. Observing how they engage during the session is just as important as what they say afterward. Pay attention to their energy levels and how much mental effort the item seems to require. After the game, ask targeted questions to dig deeper. Instead of a vague “What did you think?”, focus on Impact (did it make the game more engaging?), Clarity (was it easy to understand and use?), and Counterplay (could enemies respond fairly?). As T.E. "RPGBOT" Kamstra advises:
"At the end of every session where the homebrew content is used, you'll discuss it with the player and make adjustments".
Face-to-face conversations are great for capturing emotional nuance, but anonymous surveys can encourage honesty about potential issues players might hesitate to mention directly. Look for recurring themes across multiple sessions - patterns are far more telling than one-off comments.
Adjusting Items Mid-Campaign
Armed with data and feedback, you can start making adjustments. Be upfront with players from the start - let them know that homebrew items are subject to change as the campaign progresses. This transparency keeps everyone on the same page and helps avoid frustration when tweaks are needed.
Begin with small, straightforward changes, like adjusting damage dice, charges, or range, before tackling bigger conceptual shifts. For items with unlimited scaling, consider adding limits like “once per turn” or requiring a spell slot to activate. If an item’s triggers are unclear, spell out the exact timing (e.g., “when you take the Attack action”). Keep a version card with a brief change log so players can easily track updates and understand the reasoning behind them. This simple step can go a long way toward maintaining trust and buy-in during the balancing process.
If an item turns out to be fundamentally unworkable, don’t hesitate to remove it entirely. Offer the player a chance to rebuild their character or replace the item with something that fits the story. Sometimes, starting fresh is the best way to keep the game running smoothly.
Campaign Integration and Balance
After playtesting, it's time to bring your homebrew item into the campaign - but without throwing off the balance you've carefully built. The goal is to ensure the item fits seamlessly within your reward system, encounter design, and the expectations you've set for your players.
Balancing Within the Campaign Economy
Think of your campaign's magic items as part of a "power budget." Every permanent item you introduce increases the party's overall strength, so you'll need to adjust future rewards accordingly. For example, players generally expect uncommon items around level 4, rare items at level 10, very rare items by level 16, and legendary items at level 19. If you hand out a powerful homebrew item early, you might need to delay their next magic item to keep the power curve on track.
Use the official rarity tiers - Common, Uncommon, Rare, Very Rare, and Legendary - as a baseline for your homebrew item. Compare your creation to at least two official items of the same rarity to make sure you're not just creating a "better version" of an existing item. For example, if your party already has plenty of damage-boosting items, consider introducing something that enhances utility or exploration instead. This approach ensures your item complements the campaign's overall item economy and keeps things balanced.
Coordinating with Players
Before introducing the item, set clear expectations with your players. Explain its purpose - whether it's designed to fill a mechanical gap, emphasize a character's theme, or tie into the story. Use a "Yes, But" approach: allow the item, but outline specific limitations upfront. For instance, you might restrict multiclassing with the item or reserve the right to tweak its mechanics if it creates issues.
Plan regular check-ins during the campaign to assess the item's impact. If adjustments are needed, document them with version numbers (like v1.0, v1.1) and include a brief changelog for transparency. As T.E. "RPGBOT" Kamstra puts it:
"Decisions Can Be Changed. If you made a decision and you just had a session where you regret it, it's totally fine to change your previous decision".
Clear communication builds trust and ensures everyone is on the same page. Once you've established these guidelines with your players, you can shift your attention to encounter design to maintain balanced gameplay.
Avoiding Encounter Trivialization
One of the biggest risks with homebrew items is that they can trivialize encounters. Keep an eye on how the item affects the action economy and overall damage output. Be especially cautious with items that grant extra actions or turn bonus actions into pseudo-extra attacks without any real cost. If an item provides a consistent bonus without requiring resource expenditure, it may overshadow other players' choices.
To prevent this, impose resource costs or attunement requirements for powerful abilities. You can also include specific conditions, like requiring "attunement by a Cleric", to control who can use the item. Additionally, run a quick damage-per-round comparison between the item's effects and standard options (like cantrips or basic weapon attacks) to ensure it doesn’t make other choices irrelevant. The goal isn’t perfect mathematical balance - it’s about keeping the spotlight shared and ensuring every player's choices remain meaningful. This approach benefits both your story and your encounter design.
Conclusion
Creating balanced homebrew items is all about maintaining fun and meaningful choices for players. The process is built on three key principles: researching official benchmarks, applying mechanical constraints (like attunement or limited charges), and continuously playtesting your creations.
As Richard Bailey, Game Designer, explains:
"Balance doesn't mean every item is equal in strength. It means each item provides meaningful value without overshadowing core mechanics."
Once you've established the mechanical and design foundations, the next step is sustaining balance during gameplay. Start cautiously with your designs - it’s far easier to improve an underwhelming item later than to rein in an overpowered one after players have come to rely on it. Identifying potential issues early speeds up the refinement process.
Balancing isn’t a one-and-done task. Be upfront with your players about the possibility of adjustments, stay open to tweaking items between sessions, and document changes with version numbers for clarity. This approach aligns with the checklist's focus on thorough research, solid mechanics, and player collaboration.
Tyler "RPGBOT" Kamstra offers this advice:
"Hold Nothing Sacred."
The aim isn't to create items that rival every official option in power. Instead, the goal is to design tools that enrich your story, support character growth, and ensure every player gets their moment to shine. By combining thoughtful research, clear constraints, and ongoing testing, you can keep your campaign challenging and engaging. Stick to the checklist, and you'll consistently craft items that elevate the game while keeping things balanced.
FAQs
How do I make sure my homebrew item is balanced and doesn’t outshine class abilities?
When creating a homebrew item, it’s important to keep things balanced. Start by comparing its power level, rarity, and action cost to similar class abilities available at the same level. Tweak its damage, bonuses, or number of uses so it stays in line with those existing features without going beyond them. After making these adjustments, playtest the item in a variety of encounters to ensure it adds to the fun without overpowering class abilities or disrupting the game’s balance.
How can I create balanced trade-offs for homebrew items?
To keep homebrew items fair and engaging, it’s important to introduce thoughtful trade-offs that force players to weigh their options. For instance, you could tie the item's power to limited resources, like daily charges, a material cost, or even a small hit to the user’s hit points when activated. These limitations prevent overuse while still making the item feel rewarding.
Another way to keep things balanced is by adding situational restrictions. For example, the item’s effect might only work under certain conditions - like during the night, against specific creature types, or when the character’s health drops below a certain threshold. This creates a strategic layer where players have to carefully decide the best time to use it.
You can also balance powerful effects by including drawbacks. These could be temporary penalties to other abilities, a chance of failure, or even narrative consequences, like attracting unwanted attention from enemies or other factions. Lastly, make sure to test the item during gameplay and tweak its mechanics based on how it performs. This ensures it aligns with your game’s power level while keeping the experience enjoyable for everyone.
How can I collect and use player feedback to improve my homebrew items?
Gathering player feedback is key to fine-tuning homebrew items. Instead of asking vague questions like “Did you like it?”, focus on specific, targeted queries. For example, ask if the item feels overpowered compared to official options, whether it disrupts combat pacing, or if its theme aligns with the campaign. Providing context - such as the item’s intended level range, detailed stat block, and design goals - can help players provide more precise and useful feedback.
During playtesting, observe how the item performs in various encounters. Take note of how often it’s used, whether it shifts combat outcomes dramatically, or if it causes any slowdowns. After the session, ask players to rate the item’s power, utility, and fun factor on a simple scale. Encourage them to suggest one change they’d make. Quick surveys or casual discussions can be effective for gathering these insights.
Once you have the feedback, look for recurring patterns, such as “too strong at lower levels” or “hardly used due to a steep activation cost.” Use these observations to tweak the mechanics. Share the revised version with your group for additional testing. By repeating this process of feedback and adjustment, you can craft balanced and engaging homebrew items that add to the enjoyment of your game.


